Pages

Tuesday, July 31, 2012

New {School} Year Resolution Linky Party

Ok, let me start this post by saying that I NEVER make new year resolutions because I NEVER keep them. 

I read somewhere that it takes 21 days to create a habit (or maybe it's break a bad habit...hmmm). Well either way, I never make it to 21 days. 

A new {school} year resolution on the other hand is something I can probably handle...we'll see.

So here goes nothing. I'm linking up with Amanda over at Teaching Maddeness for her 


Resolution #1
Stay organized. I have a little problem with putting things back where they go after I'm done with them. My husband would be the first to attest to this. I don't know why, but I've been this way my whole life. When I go visit my family they love to tease that they know when I have arrived because I leave a trail of my things all throughout the house. 

My only reply: I'm great at getting organized; I stink at staying organized.

Resolution #2
Use my timer! You're probably thinking that I'll be using a timer for my students. Nope. It's for me. At our teaching conference last year I took a class on procrastination and it was confirmed. Not only am I a disorganized mess (well, not after this post...thanks Amanda!), I'm also a procrastinator. One tip I learned was to use a timer to keep yourself motivated and it actually works...when I use it! So when that heap of papers I need to grade is piling up, I'm setting the timer for 10 minutes and I can't do anything but grade until that timer dings. Then I can do 5 minutes of something that I deem "fun" like playing around with my bulletin boards or doing educational research (aka blog hopping, pinning).  

Resolution #3
Work on writing. There are so many things I want to do better this year and I know it's not realistic to try and change too many things all at once. Writing is going to be my area of focus this year. I hope to have many awesome writing posts coming as the school year progresses. 

So there you have it folks. We'll see how I do. Fingers crossed!

Thursday, July 26, 2012

Content-Free Questions- A Bookmark Freebie

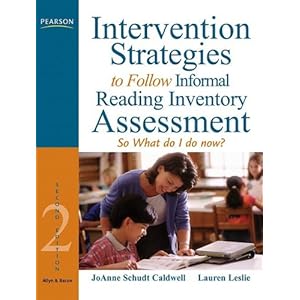
While browsing through Intervention Strategies to Follow Informal Reading Inventory Assessment: So What do I do now? (Whew! That's a mouthful!) the other day I stumbled upon some great questioning techniques to use during reading.

SIDE NOTE: Here's the one I was reading, but they're now up to at least the 5th Edition I think. 


 Intervention Strategies to Follow Informal Reading Inventory Assessment: So What Do I Do Now? (2nd Edition)

The first is using content-free questions during reading. That means that you familiarize students with questions that can be used across various reading materials.

So...instead of:

How did June solve the problem of the missing diamond?

Try:

What was the problem in the story and how did the main character  solve that problem? 

This will, "help students set specific expectations for reading."

It would be worth a quick mini-lesson to have students generate the types of questions they think would be appropriate to ask. These questions can then be turned in to a bookmark for students to refer to before, during, and after reading. 

I went ahead and used the questions listed in the book (the same types of questions I would carefully elicit from my students during our mini-lesson) and turned them into bookmarks. My hope is that I can get these bad boys to print on both sides so I have a set of questions for narratives (Tell me a story...) and a set for expository text (Tell me about it...) on the same book mark.


I'm headed to the water park in a just a bit so I don't have time to get fancy and link up a document (sorry!), but if you would like a copy just sent me a quick email (teachonalimb@me.com) or leave a comment. 

Monday, July 23, 2012

Monday Made It: Pendant Banner

Another link up with Tara from 4th Grade Frolics for a Monday Made It. 

This week: Pendant Banners. 

So much easier than my filing cabinet makeover that you can read about here

Working backwards, here is my finished banner. (Sorry the picture is not that great.)


Not sure that I love it there, but we'll see. I might put it across the windows.

Anyways, here's how I did it.

First, I made a template out of some thin cardboard I had from the packaging of some scrapbook pages.  


Keeping the fabric folded in half, I used a washable fabric pen to trace the template on the fabric.  

I cut through both layers of the fabric at once. 
 

I piled up all of my triangles according to color and kept them in pairs with wrong sides together. 


I tried pinning the ribbon in half, but the ribbon was too narrow. It was easier to fold it as I fed it through the machine. I only sewed across the ribbon, not down the sides of the triangles. I figured since it was going to be hanging it didn't matter much. I used some liquidy stuff (used to prevent fraying) on a few areas that looked like they might be prone to fraying. 


And that's all folks. It was a pretty quick and painless Monday Made It. Can't wait to see what you're linking up!


Saturday, July 21, 2012

Clip Up, Clip Down: A Behavior Management System


Confession: I have been envious of all of the darling behavior clip charts that I've seen on fellow teacher blogs. 


So you can imagine my excitement when my vice principal caught me in the parking lot after sports camp and handed me a copy of this:

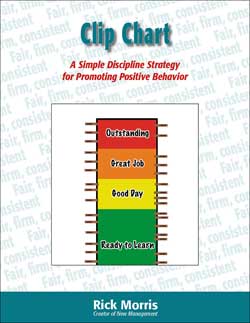
 Clip Chart eBook


We have a school wide behavior plan that uses the "pull a card" method, which is fine, and it's what I've always used regardless of it being mandatory or not. But, nonetheless, I still envied the cuteness of those clip charts. Here are some of those cuties!


[classroom31%255B6%255D.jpg] 
(I couldn't trace this darling movie themed chart, so if it's yours let me know so I can give you credit!)


(from Mrs. Sheehan over at Learning in Wonderland)

 
(A magnet version from Teaching in Flip Flops)
 
Don't you just LOVE them!

First of all, I felt honored that she would ask me to look it over and give her some thoughts and feedback. 

Second, I was so excited to think that I might be able to implement this system in my class. 

Since I'm taking good notes anyways, I figured there's no better place to also share those thoughts than here!

Rick Morris, creator of New Management, was not the mastermind behind the clip chart system for behavior management, but he offers some good explanations about why it's a good method to use. He also gives some good ideas to deal with the rebuttals that may come from the "pull a card" veterans. Snag his free e-book here if you want more details. 


Here are a few of the reasons Rick suggests we consider the clip chart over the "pull a card" method:


-All students start on the best color with the "pull a card" method, which is a level that was not achieved or earned by any of their actions. He calls this giving a sense of false accomplishment. 


-Because there is no redemption value in the "pull a card" method (you can't earn cards back) teachers may be hesitant to pull a card, or even worse, make threats about pulling cards. 


-With the pull a card method, you're focusing on negative behaviors. Students quickly learn that if they break the rules they'll pull a card, but if they have good behavior, nothing will happen. 


Overall, the clip chart has the ability to send a much more positive message to students. I love the fact that with the clip chart you can praise good behaviors as well. 


Here is my one concern: 


We give behavior grades on report cards and in the past it has been determined by how many times a child pulls a card. So.....how do I easily keep track of behavior when students are moving up and down the behavior chart all day?


Rick suggests using a behavior card called Making Better Choices that the student has to fill in when they move their clip down. You can either file it for conferences or send it home for parents to sign.

I'm thinking a fun Vistaprint project may be in the works....hmmm.....

Do you use a clip chart in your class? What do you love about it? How do you keep track of those pesky "clip down" moments? 

Thursday, July 19, 2012

Newbie Blog Hop


A huge thanks to Janis from Grade Three is the Place for Me! for putting together this great newbie blog hop. 

When you join, make sure you share: 

    1.  what state you are in
    2.  your current teaching position
    3.  your teaching experience
    4.  when you started blogging
    5.  share a blogging tip / blogging resource

1. I live on the central coast of California not far from Pismo Beach. Can anyone say California Bloggers Meet-Up!!

2. I teach 3rd grade at a private Christian school.

3. This will be my second year in 3rd grade. My first teaching experience was in a 2/3 combo class and I taught only half of that year. 

4. I just started my blog in June. It has been SO much fun. My husband thinks I'm a little nuts though.

5. Allow people to respond to your comments directly via email! This will help alleviate the need for you to try and remember all of the blogs you posted a question to. I know I never remember and so I never get my answers. Boo!

To make sure you can receive emails go in the "Settings" section of your blog and click "Mobile and Email." If you put in your email in the section that says "Comment Notification Email" you'll not only receive emails when someone comments on your blog post, but it will give people the opportunity to respond to you via email when you comment on their blog post. 


Happy Hoppin'

Wednesday, July 18, 2012

On A Roll

I've been volunteering at my church's Sports Camp this week. We ran out of pom-poms for our cheerleaders so I volunteered to hit the dollar stores to try and find some. While I was there I couldn't help keeping an eye out for things to use in my classroom. 

I found these at The Dollar Tree.


They'll be so much fun to use during math!

I found these (at a 99 cent store)...

...to turn into these:


I'm pretty sure I pinned this idea at some point. The only problem is that the containers are so small that the dice don't jumble up that much. You have to shake it REALLY hard to get them to change numbers well. I might try and exchange the containers for a little bigger size. 

How do you use dice in your classroom?

Monday, July 16, 2012

File Cabinet Makeover

Time for another link up with Tara from 4th Grade Frolics and boy is it a biggie! If you've never linked up with her, you need to right away. Well...not right this very second. Finish your reading here and then go link up {smiles}.


This week's Monday Made It was inspired by this awesome project I pinned a few months ago. You can check out her steps here.


After reading her post, I thought, no problem. I can do this. I don't have the time right now to do bargain hunting, so I thought I'd ask Mrs. T (our Vice Principal) if she would mind me making over the filing cabinet in my class. She said YES! 

So, last week I went to the school and took out all the drawers and gave it a fresh coat of paint.


 And this weekend the drawers got papered. I'm proud to present my newly made over filing cabinet!


Easy right? 

WRONG!! This was a nightmare of a project. I don't want to discourage anyone from trying so here are some things I learned to make your project go much more smoothly.

#1. Choose a filing cabinet that you are 100% sure that all of the hardware on the front will easily come off and go back on. 
Let's just say I didn't do this and that the husband had to get involved with drills and that now one cabinet has a "no longer working" knob hot glued on. 

#2. Spray paint in light coats. 
Do one light coat, let it dry a bit, go back and do another and repeat until you have it covered. I tried covering the thing in one coat which resulted in drips, which resulted in me attempting to fix said drips, which resulted in the necessity of that side having to be placed up against a wall to avoid any embarrassment.

#3. Be an expert Mod Podger before attempting. 
I used a coat of spray adhesive to get the paper to stick. The first drawer bubbled like crazy so I ran to get my Pampered Chef scraper and that only helped minimally. 

I thought maybe I didn't let the spray adhesive dry enough so I waited. I noticed ripples coming up on all the other drawers that hadn't been Mod Podged yet.  Uggh! Frustration level climbing. I reapplied spray adhesive, used the scraper to make sure the paper was really flat and let it dry. The Mod Podge despite my extra efforts. Boo on Mod Podge!

Since I had cut my paper slightly smaller than the face of the cabinet (I didn't wrap it like the one I pinned) I really only needed a seal along the edges. So that's all I did on the other drawers and they came out much better.

Whew! I'm glad that's over. 

After all that work I'm only okay with how it came out. I wish I hadn't done green. I had originally thought about doing blue or pink, but wanted something to pop more. The green sure does, but not so much in the way I had hoped. 

I think I'd be happier with the result if I had skipped the Mod Podge. I always hear about people using Mod Podge, but after this project I just think it stinks! A lot of people mention the bubbling. Why are we still using this stuff?!

Here's what I'd love to know:

What projects have you done with Mod Podge?
Were they successful or did you find yourself frustrated 
(or is that just me)?
What types of projects are best suited for Mod Podge?
What are your top tips for a successful Mod Podge project?

and last but not least, the question on everyone's mind:

How do we avoid the bubbles?!

Sunday, July 15, 2012

Some Liebster Love

I'm sorry I take forever to pass on these awards, but here goes nothing. 


This award highlights blogs that have under 200 followers. Here are the rules for it:

1. Copy and paste this award on your blog. 
2. Thank the giver and link back to them. 
3. Reveal 5 other bloggers and let them know by commenting on their blog.

Recipients:


Grade Three is the Place for Me!

SIDE NOTE: Jessica, from My Tales of a Fourth Grade Teacher, and I share not only the same name, but boy are we cut from the same cloth! Her profile sounds like I could have written it. Go check it out! 

 Create your own banner at mybannermaker.com!

Stay Calm and Teach On

Beyond The Gradebook


Another thanks to Brittany from Stickers and Stamps for giving me the award. 

Thursday, July 12, 2012

Writing Process Pencil and a Sneak Peek

I know I should be saving this for next week's Monday Made It with Tara from 4th Grade Frolics, but I just can't do it. And I do have another larger project in the works for next week!

I found this darling pencil visual to keep track of where students are working in the writing process. I pinned it from Second Grade Style

Here is my finished pencil.


Here is how I did it:

I was first inspired to actually start the project when I found the PERFECT pencil colored poster board at Michaels. In my stock of scrapbooking supplies I had all of the other colors I needed. Is that pinkish paper not theee most perfect eraser color or what!?
 

I cut the yellow poster board to be the same width as my eraser colored paper. I quickly drew in some jaggedy edges at the bottom. 
 

Then I used the brown paper for the sharpened portion of the pencil. I adhered it to the back of the yellow paper, trying to line it up carefully so I could cut a nice point. As you can see it didn't match up that great so I trimmed off some of the yellow and it was fine. 


I used a square of black paper for the tip. It was easier to adhere it to the front first and then flip it over to cut from the back.  


Next, I measured white paper three inches wide and adhered it to the top of the yellow paper. 


I cut the pink eraser colored paper 4 1/2 inches and when I stuck that on I made sure to stick it under the white so that the white was on top of the yellow and the pink paper. 


I used my Creative Memories corner rounder for the ends of the eraser. 

To finish it off I drew black lines horizontally along the white paper. And now that I'm looking at this picture I realize I forgot to trace over the lines I drew in between each step of the writing process. Ooops! I'll have to go back and do that. 


I used vellum for the titles, but one lesson learned: When using Creative Memories frosted photo splits, be sure to use Creative Memories vellum. You can tell that the drafting section is a darker vellum (the CM brand) than the other sections and so if you look up close you can see the little tabs of adhesive under the lighter sections. Oh well, it'll do. 

I'll use clothespins with student names or numbers on them to track student progress just like in the pinned version from Second Grade Style.  

Boy am I glad I found that yellow paper at Michaels! 

Here's a sneak peek at the big project I started for next week's Monday Made It!

Monday, July 9, 2012

My First Monday Made It: Teacher Toolbox

Apparently I cannot get my act together, because I have been attempting to get in the swing of this Monday Made It business over at 4th Grade Frolics and just haven't been able to make it happen. 

Why I chose this week to jump in is beyond me! Not only do I have two of my own kiddos and two brand new puppies I'm trying to potty train, I also have one Mother-in-Law (Who, by the way, I adore! Big {hugs} to all you awesome MIL's!), a 9 year old niece, and a very busy 2 year old nephew visiting. Welcome to the crazy house!


And if all that wasn't enough my stinkin' printer was going bezerk all afternoon. This is why it's nearly 11pm and I have just finished my Monday Made It. 

Teacher toolboxes have been floating around on Pinterest forever now so I am probably the last teacher on earth who hadn't made one, but nonetheless I was still very excited about my project.

I started with some scrapbooking paper, vellum, some paper ribbons from Creative Memories, and adhesives. 

I printed my titles on vellum instead of on the printed scrapbook paper. (Mrs. Rojas over at Create-Teach-Share has some great how-to tips for printing right on to the scrapbook paper.) I loved the polka-dots but didn't want the words to get completely lost by printing right on that paper. I thought the vellum might help break it up a bit.  


Next it was time to trim my paper. I cut 14 pieces that were 1 and 1/4" x 2" and 8 pieces that were 2 and 1/8" x 4 and 1/4". 


After I had my pieces cut, I stuck on my titles, added a little flair with the paper ribbons and clip art, and....TA-DA...


Now the pressure is really on for next week. Yikes!


If you want to join in head over to 4th Grade Frolics, grab the Monday Made It button and get busy!


Sunday, July 8, 2012

Reciprocal Teaching, TpT, and a Freebie for Feedback

One of my favorite lessons that I created during college was on reciprocal teaching. 

I was working with third graders at the time and wanted a fun and memorable way for them to remember the four strategies used in reciprocal teaching: Predicting, Clarifying, Questioning and Summarizing.

I decided to create little characters that would help them remember each strategy. I found clip art online and created funny little descriptions for each character that related to the strategy. I cut out the characters and descriptions and attached them to large craft sticks. 

During my introductory mini-lesson I introduced each character and the kids loved it. Then as I had them practice each strategy, they were able to hold the character. The descriptions on the back were nice because students could refer to it if they forgot what they were supposed to be doing.

I still adore my originals, but I'm not going to share them because it's possible that I kinda-sorta swiped some clip art that may or may not have been free of charge. Lets just say that my originals happen to have huge watermarks all over them. 

Moving on. 

In hopes of being able to share my delightful little friends with you, I found some adorable clip art over at the KPM Doodles Etsy shop and revamped my characters to be of a more legitimate nature.

I'd like to introduce you to my...

 I have four Buddies:


Each of my new buddies still have cute little descriptions that tie them to the strategies. I'm excited to introduce my students to my new friends. 

I also thought my buddies might be a nice first item to add to my TpT store, which currently sits with nothing in it because, well, I'm a chicken. 

So here's the deal. I'm going to give a freebie for some feedback.  

The first four of my blogging buddies (make sure you're following) to comment on this post will receive my Buddies for Reciprocal Teaching set for free before it hits TpT. 

But remember, if you get the set you have to hold up your end of the bargain and email me with some constructive (aka: sweet, kind, encouraging) feedback, since, you know, I'm a chicken and all. 

Don't stop here...keep reading, it gets better!

Since being buddies is so much fun, those first four commenting buddies are going to get to give me the name of a buddy who they think would LOVE to check out my Buddies for Reciprocal Teaching. When that friend becomes a buddy (follower) I'll send them the set for free too!  

Thanks for all your support. Now get out there and buddy up!

*November 2012 Update: You can now find these adorable buddies in my TpT store by clicking here.

Friday, July 6, 2012

Hot Diggitty Dog!

Hot diggity, a whole lot can happen when you take a few day vacation!


First exciting news that happened while I was gone: I received the Liebster and Versatile Blogger Awards from Brittany over at Stickers and Stamps. Thanks Brittany!


Liebster Award rules are:
This award highlights blogs that have under 200 followers. Here are the rules for it:
1. Copy and paste this award on your blog. (done)
2. Thank the giver and link back to them. (done)
3. Reveal 5 other bloggers and let them know by commenting on their blog. (working on it!)

The Versatile Blogger rules are:
1. Thank the blogger who gave you the award & link back to that site. (done)
2. Include the award image. (done)
3. Give 7 random facts about yourself. (see below)
4. Nominate other bloggers for the award (suggested: 15 bloggers) and include links to their sites. (coming soon!)
5. Let other bloggers know they've been nominated. (see #4)

 
My 7 random facts:
 
1. I don't LOVE coffee and I don't LOVE chocolate...I know, what is wrong with me!?

2. My hubby and I have been best buds since we were 12. 

3. I really hate flossing because I don't like putting my hands in my mouth, but I do it anyways. 

4. I had been to Disneyland about 16 times by the time I turned 18. I've been several more times since then!

5. I gave birth to my daughter while my husband was deployed in Iraq...he met her for the first time when she was 4 months old. 

6. I've been scrapbooking since I was 15. And yes, I'm still behind. How does that happen?!

7. I ran out of gas on the way to the mall the day I got my driver's license. Completely humiliating!


I guess that was the only really cool thing that happened while I was gone, but boy my eyeballs are burnin' from trying to catch up on all of the other posts I missed reading. Sheesh! You ladies don't quit...and I love it!

A few things we did while we were gone:
 
Took our first trip to LegoLand...this is my boy-boy and husband on the first roller coaster of the day.


We hit up the beach at Dana Point on the 3rd, but all the pics are on my sister's camera.

On the 4th we went to go see the LA Galaxy play. There's Landon Donovan kicking from the corner. I loved our up close seats!
 

They do the best fireworks show after the game. My kiddos loved it!


And by far the highlight of our trip was picking up these two cuties in Ventura.

I'd like you to meet:

Charly and Lily!

  
They are 9 week old Maltipoo sisters. The one on the left is Charly--she's a little fiesty!-- and the one on the right is Lily--she's my shy girl. 

Well, my friends, I'm glad to be back. I'll have a Pinterest project completed soon {hopefully} so stay tuned!