Pages

Saturday, June 30, 2012

I Learned Something New: Age +2

I started a 3-part professional development series on brain based teaching. I LOVE IT! I haven't read a lot about whole brain teaching, but I bet it's similar.

You may have already known this rule, but if not you'll probably join me in thinking, "How on earth did I not know this!?" 


Here's how this Age +2 rule works:

Take the age of the students in your class and add 2.

What you have now figured out is about how long you will be able to keep your students engaged during instruction. After that point, their little brains will automatically be scheduling a break, whether you're ready for it or not.


Immediately I thought, okay video professor man, so you're telling me that since most of the kids in my class are about 8 or 9, I can keep them engaged for only 10-11 minutes? But what about the other 40 minutes of our math period?


His advice: Make that little break the brain is going to take intentional. Schedule it!


Now, the first thing I thought of are those adorable little brain breaks that I've seen floating around on my fellow teacher blogs. If I understand correctly though, these are quick physical activities to do periodically throughout the day. 


What my video professor man was suggesting is more like a processing pause. It's a time where the teacher stops talking and the students think. The students stop simply collecting data (the teacher's words) and engage in reflection. These pauses can be as quick as 2-3 minutes, depending on the activity. 


Make sure your processing pause hits one or more of the following working memory processes:


Comprehension- in the brain this consists of sorting, organizing, and labeling recently collected data.


Elaboration- this occurs in the brain when we relate new data to past experiences or known data (long-term memory).


Application- this is where students provide evidence of understanding by using or applying the new information.


Here's what this might look like in a classroom of 3rd graders (remember, I only have about 10 minutes before little brains take a hiatus): 


9:00 Math Class Begins:
The teacher introduces common tools for measurement: ruler, yardstick, measuring cup, scale, thermometer, gallon jug, tape measure, balance, etc.


  • 9:10 Processing Pause- Have students talk with their neighbor to categorize these tools according to what they think they would be used to measure. Have students share with the whole class. 


9:15
The teacher selects one tool and gives more details about how that measurement tool is used. The teacher demonstrates how to use the tool to measure. The teacher might even call a few students up to the front of the class to see if they can mirror her demonstration. 


  • 9:25 Processing Pause- Have students take out their math journals and quickly write a few sentences about a time when they have used that measuring tool or have seen it used. Have students read their journal response to their neighbor or have a few share with the class. 

And the lesson would continue with quick reflective activities interspersed throughout. 


What other processing pauses could you use in your class?

Friday, June 29, 2012

The Write Stuff

To earn CEU's my school has signed us up for an online professional development program. It's a portal of sorts where we can watch TONS of great videos, dialogue with other teachers on various topics, and store our virtual professional portfolio. I just watched my first video and I think it's going to be a great resource for me. I'm excited to share with you what I'm finding. 

Yesterday I started putting finishing touches on the items I want in my writing folders. I love to write (and I'm pretty good at it from what I've been told...if I'm allowed to say that?!), but teaching writing this last year was a challenge for me. I knew I needed to start by getting our writing program organized. 

I used the free chevron backgrounds Dana, from 3rd Grade Gridiron, so graciously shared with us (Thanks Dana!) to create a quick and simple cover for our writing folders. 


You can snag Dana's backgrounds here!


I'll be including a "No Excuses" word list and another list of frequently used words that are based off of a list of the 1,200 most frequently used words. If you click here you can get a copy of the word lists (They are geared for 3rd grade).


 I also have a list of transition words.
I'm also going to include a little chart of proofreading marks, but don't have that put together yet.


What else do you put in your writing folders? Am I missing anything important?


Naturally when I sat down to do some of my PD videos, I had writing in mind. So without further ado...


Why do we use them? Many students:
  • have trouble organizing information
  • lack confidence
  • are unable to make personal connections to the prompt
  • don't know how to start
  • can't let go of the need to do it "right" the first time
One of the biggest barriers students face when they begin writing is the blank page sitting in front of them. 
The Strategies
  • Drawing
  • Journal Response
  • Visual Imaging
  • Research with Graphic Organizers
  • Guided Imagery
Drawing
Drawing strategies help students let go of their inhibitions and the need to do a "perfect" rough draft. One drawing strategy is a Draw Your Partner activity.

I've played games like this at baby showers where you put a plate on your head and draw the Mom-to-Be. The results are hilarious. The point, though, is that since you can't see what you're doing, you don't have the choice to worry about how it comes out. You just have to go for it!

To implement this activity, put your students in pairs. They have to draw each other without looking at their paper. You can have their partner hold another piece of paper in front of the one they're drawing on so they can't peek. 

Here's my attempt at drawing my little girl...who is much cuter in real human form! 
Once this activity is finished, and the giggles have subsided, you can easily transition into the point of letting go of the rules and focus on creating a "picture" with their writing. 

Journal Responses
Journal responses help students make personal connections to the writing prompt. Journal responses should require students to answer a few questions in their response. This process should only take about five minutes. Be sure to tailor your questions so that students can make a personal connection to the upcoming writing prompt. 

Visual Imaging
This activity helps stimulate ideas for writing. Start with piles of different images. Old calendars are a great way to collect pictures that are useful for this activity. Try to find a variety of images that would evoke a wide range of emotions and feelings. 

Students get to choose their own image and then they list words of what they see in the picture. It might start off very literal, but with practice, lists will move closer towards what they imagine they see within the picture. Encourage students to pass their image and list to several peers so that peers can add to the list. Seeing what classmates list might spur on more ideas. 

Again, the idea of this strategy is to stimulate ideas. It's a great strategy to use in conjunction with writing poetry.

Research with Graphic Organizers
Using graphic organizers helps student have a visual map of the information they want to include in their writing. When using graphic organizers while writing research papers students can easily see which information they still need to gather. 

Graphic organizers are one of my favorite things to use in a variety of content areas. 

You can get an idea of the variety of organizers by visiting here.

Guided Imagery
This activity might be better suited for middle school and high school grades, but I think you'd have to judge it based on your particular group of students.

Begin this strategy by having students close their eyes and keep everything out of their hands. Walk students through a relaxation exercise. Encourage them to let go of all the things on their mind. Ask students to begin to visualize whatever the writing prompt is. 

For example, if the prompt is about their favorite birthday, the guided imagery may sound something like this:

Go back in time to your favorite birthday. Create a picture in your mind of where the birthday was. What decorations were there? What smells and sounds do you remember? Picture the faces of the people who were there when you celebrated. Recall some of the events that took place during the celebration. Did anything special or unusual happen?

When you finish, ask students to madly free write about everything they just visualized. 

Free Write
A free write is similar to a journal response. You may or may not have a series of questions to answer in a free write. You may ask students to write everything they know about a certain topic. 

The most important thing to convey to students during a free write is that this is an opportunity to let all of their thoughts spill out all over their page. Free writes should be brief and students are encouraged to forget the "rules" and just write!

I remember doing free writes a lot in high school. My english teacher would be adamant that our pencils not stop moving, even if it meant writing the same word over and over until another thought came to mind. 

How might you use one of these strategies in your class? What other pre-writing strategies have you used?

Thursday, June 28, 2012

A Class Act and a Musical Linky Party

This year I'm going to be changing classrooms so that I can be next to my 3rd grade teaching partner. I don't mind because as a new teacher I have not accumulated nearly as much as the veterans at my school. 

I was excited to hear that my new class would be receiving a fresh coat of paint. The downside is that I've been anxiously waiting for 3 weeks to be able to get in there and start getting bulletin boards and things organized. 

With the limited amount of prep time I had before this last year my class decor left much to be desired. It was mostly a hodge podge of random things other teachers donated to me and random things I had picked up here and there. 

I am thrilled to be able to put some more thought and effort into getting my classroom set up nicely. And I love my blog design so much that I'm going to use it as the basis for my classroom theme. 

Here is what I have to work with.


Is anyone else envisioning a cubby make-over??


This white cabinet will be great for storage, but that gap at the top of the door is going to drive me crazy! Any ideas?


These are for the desks. The teal prints out much darker. More like a bright blue. I like it though!


Jo-Ann's was having a sale on scrapbook paper so I picked up these for $.35 a sheet. Not sure what I'll use them for yet, but perhaps a teacher toolbox or a file cabinet makeover. Have you seen those on Pinterest?! So stinkin' cute!
 

Here are the papers and things I've printed at home. What do you think? I can't decide if the pieces go together. I think maybe it's the stripes on the nametags?? I don't know, but I'm not quite sold yet.


I also want to take a minute to link up with Amanda over at Teaching Maddeness to share my musical favs. 


The first thing you should know is that I cannot sing. Well, I guess I can sing, I just can't carry a note in a bucket as my former "rock star" dad would say. Yup, ladies, my daddy-o was the lead singer in local band way back in the day. Long locks and the v-neck, bare chested polyester jumpsuit thingy and all. A real class act {wink}! Boy I wish I had a picture to share!

Anywho, I happened to snag my mommy's genes on this one and let me tell you, it's a terrible thing. Needless to say, I avoid singing in class if at all possible. Is that horrible of me to deprive my students of the potential learning afforded by using catchy tunes to memorize multiplication facts and other tidbits of useful information?

What I will do, though, is put on relaxing music while doing writing workshop or some other low key activity. My absolute favorite piano man is Jim Brickman. His music is so soothing and really quite beautiful. Click his album cover to check out some previews in iTunes.  

 http://a2.mzstatic.com/us/r1000/015/Music/a5/0b/5c/mzi.xqpclreq.170x170-75.jpg

He has a Disney Songbook CD that I don't have yet, but is on my "to buy" list. You can check that one out below.

 The Disney Songbook, Jim Brickman

I teach at a Christian school so I have the privilege of being able to pray with my students, and encourage them in their walk with the Lord. This also means I can put the local Christian station on the radio and I can play Christian music in class, which is what I usually listen to anyways. I purchased this next CD for my daughter since she's the musical talent in our family. I LOVE IT! The songs are great with beautiful messages. I'm taking it in to class for sure.

  Crazy Noise, Hillsong Kids Jr. 

What are you playing in class? Click on the Turn the Music Up link at the top and join Amanda in sharing some musical maddeness!  

Wednesday, June 27, 2012

It's a Plant Life

Chapters 2 and 3 of our science curriculum cover the life of plants and plant varieties. I'm continuing the work in my science journal to see what will be good activities for the students to complete.

Here is what I've come up with so far.

We'll always start with a title page of course and a section of vocabulary work. I won't picture it each time, but it'll be an envelope that contains flashcards, a memory type game, or some other hands on way to work with vocabulary. 


I want to start by brainstorming a list of all of the ways we use plants in our daily lives. This will help students make that important connection between what we're learning and their own little lives. 
 
We'll draw and label the parts of a plant and do a match up activity that explains the job that each part of the plant has to help the plant survive.

We'll discuss photosynthesis and how it is connected to respiration. I wanted to include a little flap page, but as you can see in the first picture the ends of the flaps get bent up. When we do this in class I probably won't have them fold the page exactly in half. After folding it I cut slits. On the inside of the flap I will have them describe their illustration. 


These two chapters cover SO much more information, but since I'm headed to the pool with my two little loveys, this is all I had time for this morning. What would you include in your plant section of a science journal?


Monday, June 25, 2012

What a Process!

When summer started my main goal was to reorganize, revamp, and rethink my teaching and curriculum. 

Whew, what a process this is! It is extremely time consuming, a bit overwhelming at times, and so much FUN! It's so much fun that once I'm certain everyone in my family is fast asleep, I sneak out of my bed to hit the computer for more ideas. It's too bad I don't drink coffee, because I could probably use some right about now. 


While I'm on the topic of processes, I thought about the writing process. I love that my school still teaches traditional grammar, but I want to put some more life into the writing portion of our Language curriculum. 


I figured I should start at the beginning and whip up some writing process posters that are based on our curriculum. I had some store bought ones but they didn't match the curriculum. Boy was that confusing!


Click here to get a copy! They need to be printed on ledger sized paper which is 11x17. I know that's a pain, but I wanted them to be bigger than a regular sheet of paper.


I also want to take a minute to pass on the One Lovely Blog Award.

Here are the rules for this award:
Once you receive the award, you must follow 3 rules: 


1.  Follow the person that gave you the award

2.  Link back to the person that gave you the award 

3.  Pass the award on to 15 new bloggers

Now, I had a hard time finding 15 new/newish blogs that hadn't already received this award, but I found a few. I'll keep looking! 
Here goes:


Saturday, June 23, 2012

What's in Your Ecosystem?

My science make-over begins with the chapter on Ecosystems. I want to incorporate science journals this year so last night I sat down and brainstormed some ideas based on the content of the chapter. 

Today, my little lovey (my 3 1/2 year old daughter) helped me put together some sample pages. Well, mostly she did some cutting and pasting and ran back and forth from the printer to get the papers out. Oh, and she thoroughly enjoyed getting me the correct color I needed from the crayon/colored pencil bin. Love her.


 Here is what me and my little helper came up with today.
I'll start each chapter with some vocabulary work. The envelope will hold either flash cards, a memory game, or some other fun vocabulary activity.

Our curriculum gives four characteristics of living things, so I put together a table where students can compare things in our environment against those four characteristics to decide if it's living or nonliving. This should be a quick review for most students.
We usually do science in the afternoon, which is about the time the kids start to get a little squirrely. What better way to get some of the wiggles out than with an nature walk?! While we're on our walk we'll take our journals and stop periodically to jot down things we see in our ecosystem. We'll use a t-chart to categorize them as living or nonliving. 
 

This next part was Lovey's favorite! She got to cut and paste a ton, while Mommy did the drawings. I'll have my students search magazines, find clip art, and make drawings for each category.


I found the little ant and snail pictures shown above as part of a teacher resource called "Do the Rot Thing," which is all about composting. I liked that it gave information on a TON of decomposers, which were even hard for me to list. Anyone have a composting program at their school or in their class? That would be interesting. Hmmmm....

Lovey helped me cut and paste a food chain using pictures we found in our clip art file. A great way to integrate a computer skill that we work on in our tech class.
 

I found a great online tool through Scholastic. It will help you create a food web, and after answering a few questions you can print the nifty certificate below. I'll have students glue the certificate into their journals. Check it out here.


I put together a quick chart where students can write in examples of when an animal would need to hibernate, migrate, or camouflage in order to survive. 


There are several points within this chapter where I'll have them answer questions or make responses in their journals. These questions/prompts might be:

  • How does a decomposer help an ecosystem?
  • Why are scavengers important to an ecosystem?
  • What ways can you help to protect the environment?
  • What does the environment in your room look like? Draw it!
  • List 3 animals and describe the niche of each animal.
  • Describe a time when you were in a competition. Why do animals have to compete?
 I'd love to hear some of your ideas for Ecosystem journal entries. 


A big thanks to fellow newbie blogger, Brittany over at Stickers and Stamps for surprising me with the One Lovely Blog Award. 


As part of receiving this award it will be my privilege to pass on the award to fifteen new bloggers. I'll try to get my 15 fav new blogs posted soon. Thanks again Brittany!

Friday, June 22, 2012

Winner, Winner, Chicken Dinner

Anyone else's quirky family use this expression? When I went on my road trip this last weekend we were playing cards (as we usually do at family gatherings) and this expression was floating around the table. My mom was also using it to start a lunch eating race between my two darlings and my nephew. After my nephew finished first my mom said, "Winner, winner, chicken dinner!" My nephew started running around exclaiming, "Yay, I won a chicken dinner!" It was hilarious. 


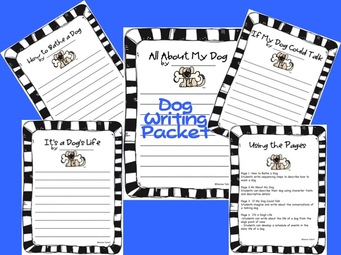
All that to say....I'M A WINNER! I entered a quick "dog days of summer" followers giveaway over at Yearn to Learn and I won! Thanks so much Denise!

You can pick up this darling writing packet at her store, Talbot's Teaching Trove.


  Picture 

 I was so excited about my win, I didn't hesitate to enter Katie's giveaway over at Dirty Hands and Lesson Plans for a chance to win a TON of great resources and a signed copy of Have You Filled a Bucket Today, by Carol McCloud. Pop on over and enter, you still have a few days!

And after posting last night about my spelling plan for this year, I opened a mysterious tab on my internet browser and there was David M. Lund, Professor of Literacy and Language at Southern Utah University staring me in the face! An absolute miracle. You can check out his extensive list of literacy resources by clicking here. The high frequency word list document is under the fluency section. 

And now for a proper thank you to Professor Lund!

Happy Browsing!

Spruced up Spelling

Curriculum planning- check
Organize teacher binder- check, check
Conquer the content....

Ok, so that last item sounds too daunting to tackle at once, so I'm going to go one by one. That's hard for me because that means focusing on one thing for possibly several days. Not pleasant. It's why I gave up trying to learn big, complicated quilting patterns. I don't have the patience for that. Give me a "finish in an hour" sewing project and I'm all over it. 

I do have a set curriculum that I have to use, but I'm going to give myself permission to spruce it up a little. (Since I just passed on my blog info to our vice principal I'm going to insert a big smile and  hug for Mrs. T...just in case she's reading) I started with spelling. No particular reason for starting there, other than it sounded easy.

The only reason it sounded easy is because the amazing Beth Newingham shared her amazing word study program in her Scholastic blog (check it out here). I had read the post prior to last school year, fell in love with the program, and had it up there on my list of things to implement in class. Well, with only 5 days to set up a classroom, it goes without saying that I never made that happen. 


My major setback for implementing a program like Beth's is timing. After a year in the class I realize that I may not have time to spend 20-30 minutes a day on word study, which is unfortunate because it's so important. So this year, I'm going to implement what I can. With the other tweaks I plan on making to other areas of the curriculum (smiles again Mrs. T), I may find that the following year I'll have time for a baby Newingham word study program to be flourishing in my classroom. Anyone else have a Newingham-ish program going on in their class?


Here's how I started taking baby steps.

Step One: Identify Spelling Patterns
I took our spelling curriculum (A Reason for Spelling-Level D), and mapped out the spelling patterns for each list. Sort of feels all over the place. Ok, woosah (man, I had to look that one up too) as my husband would say. I can do this!
Step Two: Incorporate High Frequency Words
I found a list of 1,200 high frequency words very nicely explained when I Googled "sitton high frequency word list". The Google result is a .doc file and I can't figure out how to get to the original source, so thank you to the faculty member from Southern Utah University who put this resource on the web for me to snatch. If you can't find it through Google, send me a quick message and I'll get you a copy. I am going to use Beth's student sheets for marking high frequency words. She has them in groups of 100 and you can get the documents through her post. See the link up towards the top. 

Step Three: Vocabulary
Our curriculum across the board is pretty weak in vocabulary instruction so I thought I'd sneak in a little with spelling. Our curriculum has weekly lists of 18 words so I chose two of those words to make into vocabulary words. I created 3rd grade friendly definitions for 2 words from each list. 

Step Four: Homework
I liked the idea of Beth's cover letter with her homework. I created something similar where I could explain the spelling pattern, list the spelling words, list the vocabulary words and definitions, and give space for students to fill in their high frequency words. I slightly modified the tic-tac-toe spelling grid that Beth shared.   

Step Five: Assessment
I followed a similar format for my testing page, but modified it to include my vocabulary words and to exclude the "new pattern words" that Beth refers to. I'll also only be giving one list per week so aside from having students test each other on high frequency words I can administer the whole test myself. I will require students to know the full definition for the vocabulary words. They don't have to use them in a sentence on the test. High frequency words will be used in sentences. Students will keep a log of missed words and after every 5th week, they'll have a list composed of those missed words. I'll have to come up with some challenge lists for my super spellers!
I'm pretty happy with my goals for spelling this year. I think this will be a manageable transition. I'm excited to see how it works in "real time."  Here's to inching out on that limb!

Wednesday, June 20, 2012

A "Maddening" Giveaway

Amanda from Teaching Maddeness started her blog only 18 days ago and I am honored to be her 235th follower. Congratulations Amanda!

In celebration of passing the 100 follower milestone, she is offering a giveaway that you do not want to miss. In conjunction with Teacher's Clubhouse, she is giving away:

A FREE UNIT of YOUR CHOICE from TC,
EVERYTHING in one of TC's classroom theme categories (your choice of theme)
AND
a $25 giftcard from Barnes & Noble!!
 
You only have 2 more days to join in. The fun ends on June 23rd! Don't miss it. 

Tuesday, June 19, 2012

MISSION: Teacher Binder

4 day road trip + not thinking about school = one refreshed and happy chick


I had to renege (ri-nig, I needed to look that one up) on the refreshed part because seriously who is refreshed after traveling over 600 miles by themselves with a 6 and 3 1/2 year old? Not me, that's for sure. But the suitcase is unpacked, the laundry is tumbling away in the dryer, and the car is cleaned out (sort of), which is at least a step in the right direction. 

Another step in the right direction was knowing that in order to get out on that limb I was going to have to get myself organized. Tonight I was able to put some finishing touches on a teacher binder I had been working on over the last week and a half or so. I was inspired by Alicia's curriculum plan and lesson plans page from Keeping it True in K-1-2. I brought all of my curriculum books home and started to go through them one by one, filling in the chart as I went. I was able to see what areas of my curriculum I could integrate and also how I needed to reorder units to better meet our state's Common Core Standards. 


My lesson plans page is ready to be filled in with fun for the first week of school. I'm still pinning ideas like crazy on Pinterest, and I'm sure more posts on that topic will follow. 


Since I write so messy big, I have a hard time using traditional grade books so printing my own usually helps. At my school, students earn a work and study habits grade based on turning in work on time, meeting deadlines, having their planners signed, and returning Friday folders and weekly reports on Mondays. I use a simple checklist style sheet throughout the week that I normally keep on a clipboard for easy access, but filled out sheets will make their way into my binder. 

No teacher binder would be complete without an adorable cover. Thanks to Dreamlike Magic Designs for the darling clipart (and blog design). 

finished teacher binder = one refreshed and happy chick


Friday, June 15, 2012

Doodles and More Doodles

What I should be doing: 
Goal setting (fancy words for to-do list) so that next year I can get out on that limb and pick some fruit!

What I am actually doing:
Finding super awesome FREE doodley clip-art from The Scrappin Cop

Check out what I snagged...