Pages

Showing posts with label crafting. Show all posts

Monday, July 29, 2013

Monday Made It- Ruffle Bags

Today I'm linking up with Tara at Fourth Grade Frolics for another Monday Made It. 
 
Wahooo, that's two in a row. Unfortunately, this is related to school 0%. But, I was so proud I just had to share. 

My dear friend has the cutest twins who just turned 6 and I made them these ruffle bags. Matching, but not matchy-matchy if you know what I mean :)


They're the same size, the picture on the left is just closer up. The one on the left is the one I did first. I definitely had to work out some kinks when I made that one. The one on the right was much quicker and a tad straighter. Good thing little girls don't notice stuff like that!

Here's a link to the Pin that inspired this fun little project. 

And here's why I was not able to get anything school related (or otherwise) all week long...well except for my sewing project which took me about one long ol' nap time to complete: 


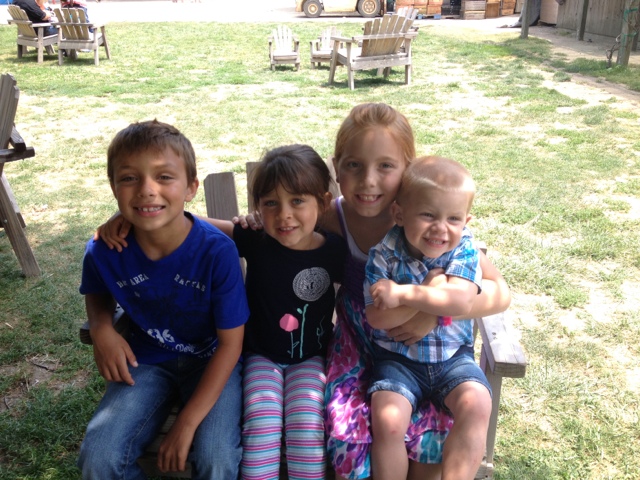
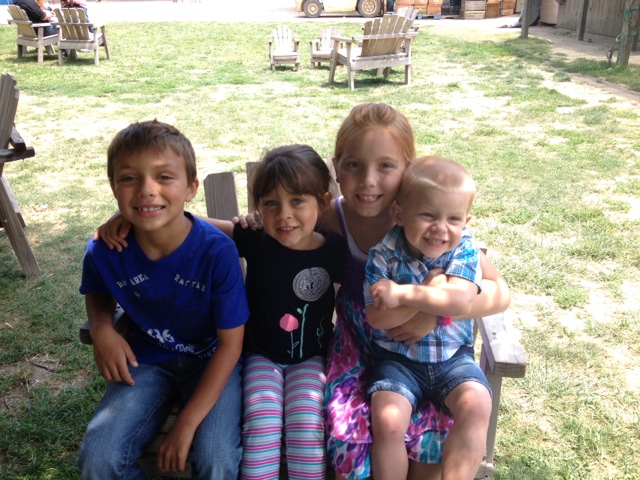
My niece and nephew (the two on the right) came to visit for the week. So it was me all day by myself with a 10, 7, 4, and 3 year old. Oh. My. Word. And that's all I have to say about that. 

And after the first poopy diaper {yuck!} I had the brilliant idea to potty train my nephew. Good thing he was totally ready for it and it was the easiest potty training ever!
 
 
 Doesn't he look so happy! 

Now run along and check out all of the other amazing link ups for this week's Monday Made It. 

And don't forget to come back for the next post in my Mega Management series. 

Monday, July 22, 2013

Monday Made It

Okay, so today is my FIRST Monday Made It of the summer. I cannot believe I just typed that!
 
Before you read on too far here is my disclaimer: No paints, glue, glitter, Mod Podge, frames, ribbons, crates, stamps, fancy stickers, magnets, sequins, burlap or fabric of any other kind were used in the making of any of these "Monday Made Its". 

Ugh. I cannot believe I just typed that either!

Ok, so nothing that I made is extremely "pinteresting" or even pin inspired...well, except for one thing...BUT,  I worked hard on these little projects (I have the aching fingers to prove it!) and above all they were made with L-O-V-E love which in my mind qualifies this post as Monday Made It material. 

Without further ado...my first (and possibly only) Monday Made It of summer 2013:

This first one was something I pinned oh so long ago from First Grade Glitter and Giggles:


I tried to make mine a little smaller and a bit more 3rd grade friendly. Thanks to My Cute Graphics for the darling images I used.   

Here's where the aching fingers begin...

I typed 322 high frequency syllables that I'm going to use for a word study program I'm implementing this year (more on that in a future post). 

But it didn't stop there. 

Not only did I have to type all those words, I had to cut out 322 flash cards, laminate all the flash cards (and I can't really take credit for that...huge shout out and many hugs to Karen in my school office who totally rocks and did it for me), then cut all 322 out again! 
 

So sad to think of how long it took to fill that tiny little Ziploc....

As if that wasn't enough punishment for my fingers, I cut and laminated these two activities also.
 Check out that stack! Can I get an "ouch" from anyone out there!?

Update: These poke cards are from Flapjack Educational Resources. 
Click HERE to get them free. 

I love that it's a self checking activity and it was a freebie I found last summer. I just can't remember who I got it from. 


UPDATE: It was a flash freebie from Hooty's Homeroom,
but you can still purchase it from her TpT store by clicking here.

I can't remember where this one came from either...YIKES. Anyone have a way for managing this stuff. My brain can't hold all the information. It's amazing that I even remember my own children's names any more! (If either activity belong to you please let me know so I can link up appropriately!)

And yes, those are frosting cans. I actually had this printed last summer, but it took me that long to remember to save those stinkin' cans. I remember that being a suggestion on the blog I found this on...I think...either way it's so clever, huh.


This is a huge pile of all the things I need to start my Multiplication and Division Boot Camp from 3 Teacher Chicks. I know I didn't really "make" this, but that was a lot of copying, cutting, and paper clipping. It just feels so darn good to share something I've checked from the To Do List! And...I also copied all of my Bible tests and spelling pattern take home pages for the year...glad I could sneak that one in at the end ;o)

Head on over to Fourth Grade Frolics and see what everyone else has been up to this week.


Thursday, August 2, 2012

Yard Sign Makeover, Mod Podge {really?!}

SIDE NOTE: (hmmm, can you have a side note before you get started. Not sure about that, but I'm going to do it.) I'm only 7 followers away from hitting 100 which means a giveaway is brewing. If you'd like to help me celebrate by donating a giveaway item, send an email to teachonalimb@me.com

Now back to the purpose of this post...

I was terribly bummed when I didn't have a single thing to share for Tara's Monday Made It linky, but in my defense my Mom, her hubs, and my nephew were visiting this weekend AND my mom and I repainted my kitchen and half of my family room. 

I was totally able to forgive myself after I created this beauty:


Take note of this moment folks. This may be the one and only time that I actually create something from an idea that came from my very own brain without any influence from another blog or Pinterest. I'm going to cherish this moment!

Here's what I used:
  • Mod Podge
  • spray adhesive
  • sticker letters
  • 2 yard signs
  • large gift bag
  • extra paper 

The best part is that I got the bag, yard signs, and sticker letters from the dollar store. What a score!!


I started by taking apart the polka dot gift bag and laying it out flat on my work table. I flipped the yard signs over and traced them onto the bag.

I cut out my pieces from the gift bag and used spray adhesive to stick them to the front of the yard signs. I sprayed the adhesive directly on the yard sign to make sure I didn't miss any edges. 


I used some clip art from my blog design to add a little more color. I knew the letters weren't going to be enough. I originally wanted to cut out the branch and individual leaves so I didn't have that icky white background, but guess what...I didn't have the patience for that this morning so icky white background it is.


I hadn't quite figured out what I was going to say on the sign when I was shopping so I ended up having to make a few e's out of paper and using some of the leftover letters to get creative and form letters that I was short on. I wasn't so great at making the words centered on the sign {obviously}. I think it's cute enough that I can deal with crooked. 

Here it is again:  


I made 2 signs so that I can have them back to back in the little ground cover area outside my classroom. 


This picture was pre-Mod Podge just in case I messed it up. As a final step I Mod Podged the top just to add a layer of protection against our morning coastal fog. 


Those of you that read my filing cabinet fiasco (which you can read here) are probably thinking--Mod Podge again...really?! I know. Tell me about it. But I did learn that the less papery the item you're Mod Podging the better. I didn't have nearly as much trouble this time around although the letters did bubble just a bit. 


If you have some Mod Podge projects to share or if you're a Mod Podge expert with some helpful tips go back to my filing cabinet post and link up to my Mod Podge Mania.

 Photobucket


After Mod Podge project number two I can say that Mod Podge doesn't stink as much as I originally thought, but I'm not completely sold either.