Pages

Friday, August 31, 2012

Tech Tools: Educreations

I am so excited about this post because I think the resources I am going to share are simply amazing! Several other fabulous bloggers have already mentioned these tech tools, but I promise they are worth mentioning again. 

Awhile back I posted a video for how to create a classroom website and blog using Weebly For Education. You can check that out here.
I have been slowly adding resources for parents and students. I've entered a few blog posts myself, but hope to have student input soon!

Today I posted a video about rounding numbers. I created the video using the Educreations app on my iPad. With this app I was able to record my voice while I demonstrated the lesson on a virtual whiteboard. The great part is that you don't have to have an iPad to use Educreations. You can use it right online!

Here is a what the screen looks like when you begin creating a lesson online. When you do it through the app it looks like there are a few more options, like entering typed text. 


Using your finger or a stylus, you can write whatever you would normally write on your whiteboard during your lesson. I love that I can easily change colors, insert typed text, and clear the screen quickly to make more room on the "board". 

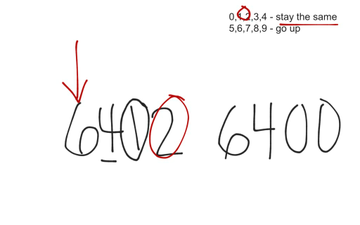
Here is a screenshot from the end of my lesson on rounding.

Rounding 

The best part is that I can email this video to parents, share it on Facebook or Twitter, or embed it in a blog, like I did on my Weebly site. 

It's too late now, but first thing in the morning I'll be using remind101 (if you're not familiar with remind101, you need to head over to Mrs. Stanford's blog and check out her video tutorial) to quickly let parents know to check the blog and watch the video on rounding. Now all of my parents will know how to help their child at home, and students can have a quick refresher if they need it. How great is that!   

Saturday, August 25, 2012

Classroom Tour

The fact that I'm just now (after a week of school) posting pictures of my class is a sure fire indicator that the last two weeks of my life have been absolutely crazy!

I was putting it off because I kept coming up with things that I still needed to do, or wanted to fix, or wanted to add to. I finally realized that if I didn't just share it now, it might be June before I really finish everything I want to do. 

You can see the before pictures here

This next picture is from the main front door.

This next one is from the opposite corner. 


Attendance markers right when you walk in. 
This is the side of my filing cabinet. 


My group table. The bookshelves could really use some work.


My board for jobs. The little signs says, 
"We're going out on a limb to give a helping hand." 
I am going to put little hand cutouts with their name in 
each of the little job title pockets.  

 My cubbies got a new paint color!
 
My student center right on the other side of the filing cabinet. I saw this idea on another blog, but have no idea which one. If you have a student center, link up in the comments!

 My calendar/schedule boards. 

Below is a picture of my favorite back to school activity that we did this first week. These darling Bagpack getting to know you crafts can be found on TpT if you visit Mrs. H's store from Once Upon a First Grade Adventure.


Happy Back to School everyone! 

Monday, August 13, 2012

WINNERS! 100 Follower Giveaway

I'm so excited to announce the winners of my 


Congratulations to:

Carolyn who won my Birdie Nameplates and Calendar Accents.

Layla who won an item from Surfing to Success' TpT Store.

Hope who won an item from An Apple for the Teacher's TpT Store.

Sara who won The Gypsy Teacher's Homophone Match and Patch.

Heather who won a Polka Dot Owl Classroom Super Pack from First Grade Fascination. 

WHEW! That was fun. Not a bad way to start off your week ladies!

Thanks to everyone who entered. And congratulations again to our winners. Watch your emails for your prizes. 

Happy Monday!

Sunday, August 12, 2012

Back To School PowerPoint Presentation

Meghan over at Third Grade in the First State is flippin' out after reaching 200 followers and is having an awesome giveaway. You don't want to miss this one!
 

I'm also flippin' out because she's so sweet and let me be part of her giveaway. 

One of her prizes includes a customizable Back to School PowerPoint presentation made by ME! Yay!

The presentation includes 24 slides setup so you can input your own information.  Here are a few of the slides included. 


Now hurry over to enter Meghan's giveaway and then make sure you have these two fonts installed and ready to go, ya know, just in case you win!

Minya Nouvelle

Digs My Hart

*If you don't have these installed, I'm pretty sure PowerPoint 
will default to a potentially way less cute font.
Keep the cute. Install the fonts.

Thursday, August 9, 2012

Laminating Frenzy Begins With Taking Attendance

First of all, thanks to everyone who has entered my 100 Follower Giveaway. I can hardly wait to pick some winners! If you haven't entered yet click the button below. 


Now for the frenzy.

It was impossible to resist the urge to run out and purchase the Scotch Thermal Laminator after hearing the wonderful things you fabulous teacher-bloggers were saying about it. 


I had been going back and forth about it for days, but let me tell you that my money was well spent on this baby!

And I'll admit that today's laminating didn't exactly reach full frenzy potential, but I can assure you that it will soon.  

Last night I whipped up some attendance markers to put on the side of a filing cabinet that I have right near the entrance to my classroom. Those were the perfect thing for my first lamination project. I'll just attach a little magnet to the backs later.


Sorry about the shadowy/blurry picture, it's late here. Anyhow, minus the sore hand from cutting a gazillion circles, I'm very happy with how they turned out. 


I included numbers 1-30 in duplicates of pink and blue. All of my students are assigned a number so although number 1 is a girl this year, number 1 may be a boy next year. I figured I better make them both now and get it over with. 

Maybe one day I'll have a TpT or Teacher's Notebook store, but for now I'll give a set of these cuties to the first two people who comment and ask for them. 

Speaking of cuties, here is Charly after her first trip to the groomer. I was amazed that I could actually see her eyes. I don't have a picture of Lily because she wouldn't stop whining...I think she was traumatized. If you didn't catch the pic of them pre-groomer and about a month ago check them out here.

Wednesday, August 8, 2012

A Dish Drying Rack Filing System

Last year I came across this darling "on the go" organization system (made with a drying rack for dishes!) on Pinterest. You can find the original source here.

On-the-Go Filing 

I had high hopes that this would solve my at-home paperwork dilemma. After much searching, I found the drying rack at Target, but only in black. And then I couldn't find very cute folders...although I didn't search all that hard. I never got around to labeling it, I did shove some papers into it, but it mostly collected junk.

When I walked into the Dollar Tree today and stumbled upon these cutesie folders I just knew my junk collector needed another shot at fulfilling its purpose.


Hopefully its purpose this time around will be to provide me with a place to store my daily folders, To Grade folder, and To File folder. Is that totally weird to file papers in a file, and then eventually file those same papers elsewhere?! 

Logic would tell you just file them where they belong the first time. I've lived with me for many years and I can tell you right now that ain't gonna happen! I'm hoping this intermediate place will help. 

Here it is all put together.


Now if that's not screaming PIN ME then I don't know what is! I love how it came out. (Please un-notice that I don't have my files labeled {again}. Thanks!)

Be sure to join in my giveaway before you hop on outta here.

Monday, August 6, 2012

100 Follower Giveaway!

I cannot tell you how enriching it has been to be a part of this online teaching community. Everyone that I have "met" has been so generous with their time, resources, and knowledge. So a HUGE thank you is in order to all of you who have helped me reach this amazing point...100 followers! 

To celebrate I'm teaming up with some fab gals to offer some great resources in my...


I'll be giving away this set of nameplates and calendar accents.


You also have the chance to grab a TpT item from Mercedes at Surfing to Success


A TpT item from Kelly at An Apple for the Teacher

A Classroom Super Pack from Rebecca at
First Grade Fascination

and a Homophone Match and Patch from Allie at
Photobucket

Thank you ladies for your generosity 
and willingness to help with the giveaway!

Help show these ladies some love by checking out their blogs and shops and following along. I look forward to reading your comments!

a Rafflecopter giveaway

Friday, August 3, 2012

Weebly...A Classroom Website Video Tutorial

A huge thanks to Michele from Multiage Moments for inspiring me to take the plunge and start a website and blog specifically for my students. 

She has a post that shares about her experience having her students blog and she also gives a few sites you can use to build your site and blog. You can check that out here.

I decided to go with Weebly for Education. 

I chose Weebly mainly because our technology teacher uses it with our middle school students (so I know it must be easy!), but also because it was free and it allowed me to have a site and a blog together rather than being geared towards every student having their own blog (which is not what I wanted to do).  

Here is a very quick and very basic tutorial for setting up a website and blog through Weebly for Education. Please excuse my kids screaming playing in the background. Let me know how the video comes out. It was quite a fiasco trying to get rid of the blurriness factor and I'm still not 100% sure it worked. Thanks in advance!


Thursday, August 2, 2012

Yard Sign Makeover, Mod Podge {really?!}

SIDE NOTE: (hmmm, can you have a side note before you get started. Not sure about that, but I'm going to do it.) I'm only 7 followers away from hitting 100 which means a giveaway is brewing. If you'd like to help me celebrate by donating a giveaway item, send an email to teachonalimb@me.com

Now back to the purpose of this post...

I was terribly bummed when I didn't have a single thing to share for Tara's Monday Made It linky, but in my defense my Mom, her hubs, and my nephew were visiting this weekend AND my mom and I repainted my kitchen and half of my family room. 

I was totally able to forgive myself after I created this beauty:


Take note of this moment folks. This may be the one and only time that I actually create something from an idea that came from my very own brain without any influence from another blog or Pinterest. I'm going to cherish this moment!

Here's what I used:
  • Mod Podge
  • spray adhesive
  • sticker letters
  • 2 yard signs
  • large gift bag
  • extra paper 

The best part is that I got the bag, yard signs, and sticker letters from the dollar store. What a score!!


I started by taking apart the polka dot gift bag and laying it out flat on my work table. I flipped the yard signs over and traced them onto the bag.

I cut out my pieces from the gift bag and used spray adhesive to stick them to the front of the yard signs. I sprayed the adhesive directly on the yard sign to make sure I didn't miss any edges. 


I used some clip art from my blog design to add a little more color. I knew the letters weren't going to be enough. I originally wanted to cut out the branch and individual leaves so I didn't have that icky white background, but guess what...I didn't have the patience for that this morning so icky white background it is.


I hadn't quite figured out what I was going to say on the sign when I was shopping so I ended up having to make a few e's out of paper and using some of the leftover letters to get creative and form letters that I was short on. I wasn't so great at making the words centered on the sign {obviously}. I think it's cute enough that I can deal with crooked. 

Here it is again:  


I made 2 signs so that I can have them back to back in the little ground cover area outside my classroom. 


This picture was pre-Mod Podge just in case I messed it up. As a final step I Mod Podged the top just to add a layer of protection against our morning coastal fog. 


Those of you that read my filing cabinet fiasco (which you can read here) are probably thinking--Mod Podge again...really?! I know. Tell me about it. But I did learn that the less papery the item you're Mod Podging the better. I didn't have nearly as much trouble this time around although the letters did bubble just a bit. 


If you have some Mod Podge projects to share or if you're a Mod Podge expert with some helpful tips go back to my filing cabinet post and link up to my Mod Podge Mania.

 Photobucket


After Mod Podge project number two I can say that Mod Podge doesn't stink as much as I originally thought, but I'm not completely sold either.